This article was to have appeared in Wargames Painting and Modelling, which, it sadly appears, is not publishing any new issues. Rather than let the article go to waste I've decided to put the it up here.
This is a guide to how I go about painting 10mm figures. It may seem overly detailed to some, but there’s nothing particularly complicated involved, and I hope that at least some of the techniques should be useful for people painting small figures. I use the same techniques on 15mm figures and they ought to be applicable to any size of figure smaller than 28mm.
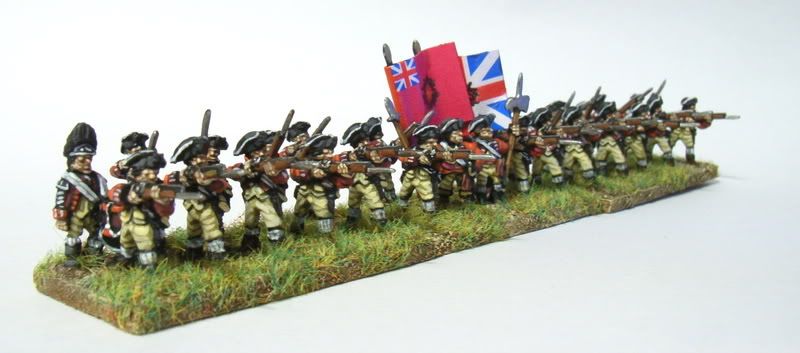
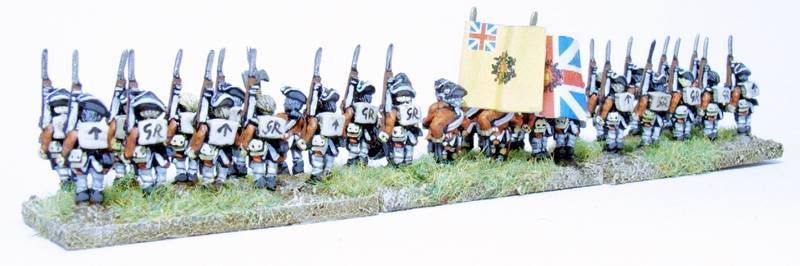
These particular figures are part of Pendraken’s American Revolution range. I have tried to sculpt with the ease of the painter in mind, and have put as much detail in as I can. My approach is that it’s easier for the painter to leave out detail if he or she chooses than to paint in something that’s not sculpted.
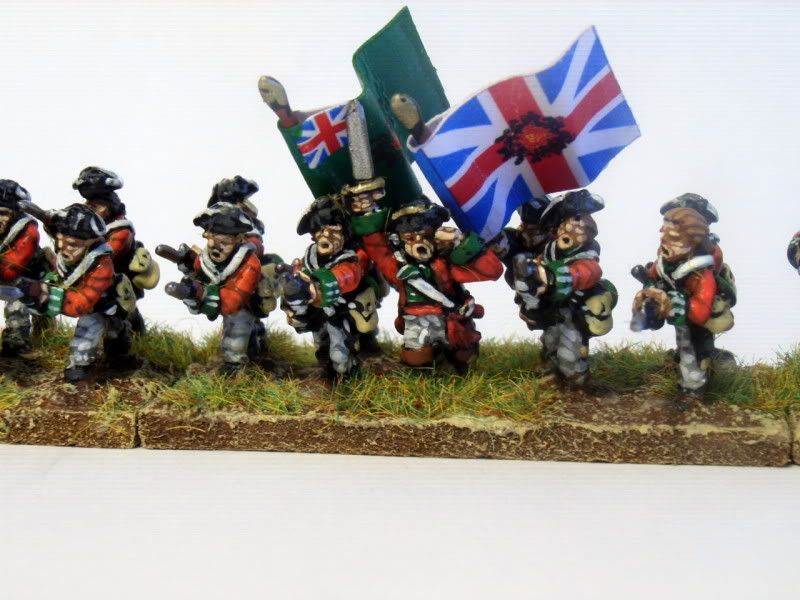
For this article I have chosen to depict the Royal Regiment of Ireland, the18th, as they are local lads to me!
Preparation
10mm figures can be ruined by mold lines that would be fairly insignificant on larger figures so be careful to check through and file them down along with any flash. This can be very tedious if you are doing a lot of figures, but it’s worth doing if you intend to paint them well. You’ll probably have to file the base too as there’s often a metal peg where the figure has been clipped from the sprue it leaves the mould on.. I always wash the figures in detergent before undercoating.
Undercoating
There are a number of schools of thought on undercoating, the most popular being white or black undercoat. Personally I find white undercoats difficult to work with, especially on very small figures; black undercoat offers you a instant layer of shading and is much more forgiving if you don’t paint every last detail on the figure. It is true that a white undercoat will give you brighter colours which can be beneficial with small scales, but the costs outweigh the benefits and I recommend being generous with the pigment anyway.
A good matt black spray is easy to find, but you might experience coverage problems with 10mm figures or smaller. I sometimes give the figures a quick black wash before spraying them to ensure all the nooks and crannies have been reached, though be careful to allow the blackwash plenty of time to dry, at least overnight.
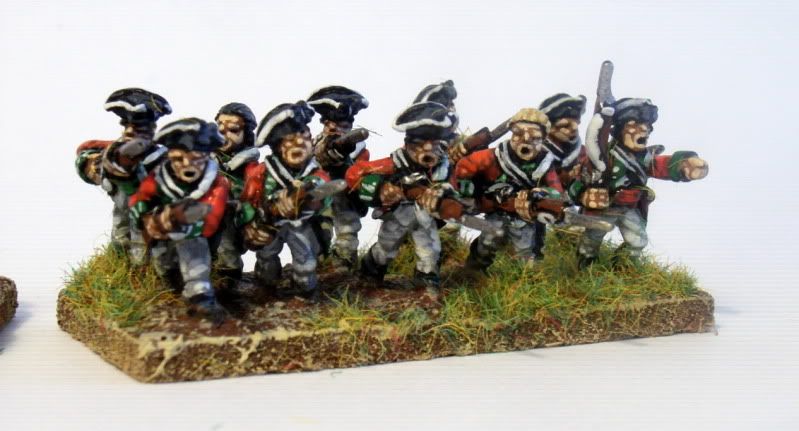
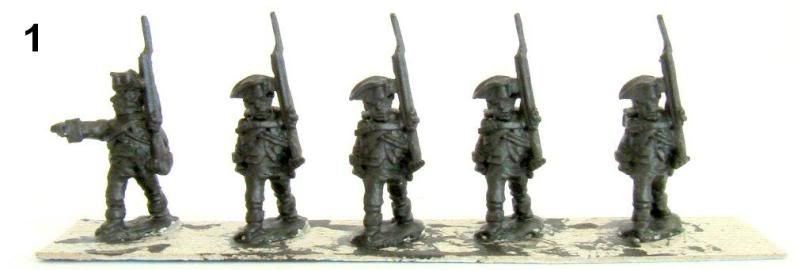
Once the undercoat is dry I pick out the figures which have identical poses and stick them on a thin piece of cardboard. About five to six figures are ideal. You can do this before undercoating, but I find it makes the underside of the figures difficult to get at when trying to spray. Once this is done painting can start (Figure 1).
Painting
As a general comment don’t thin down your paints too much; the aim is to cover the black undercoat with one coat, and to keep the colours bold and bright; remember these guys are small. Sounds obvious, but it can be easy to forget when concentrating on detail.
I start with the areas I intend to use two colours on. This is a step which can be considered optional, the highlights used later can be applied directly over the black undercoat if you wish.
Its is best limited to the largest areas of the figure, on these British Infantry, I’ve chosen the breeches and waistcoat, the coat and the pack. Baring in mind that the contrast between the shade and highlight colours should be pretty high, I’ve used
Foundry Arctic Grey Shade for the breeches and waistcoat (don’t shade the belts or they won’t stand out as well) and
Miniature Paints’ Red darkened with a bit of brown for the coat (Figure 2).
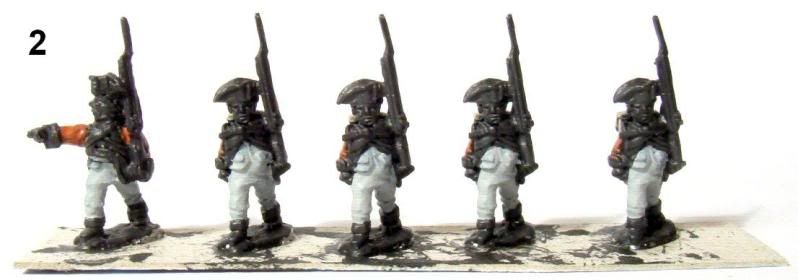
This red is my favourite, but any mid-red will do. I want the backpack to be goatskin, so I’ve chosen
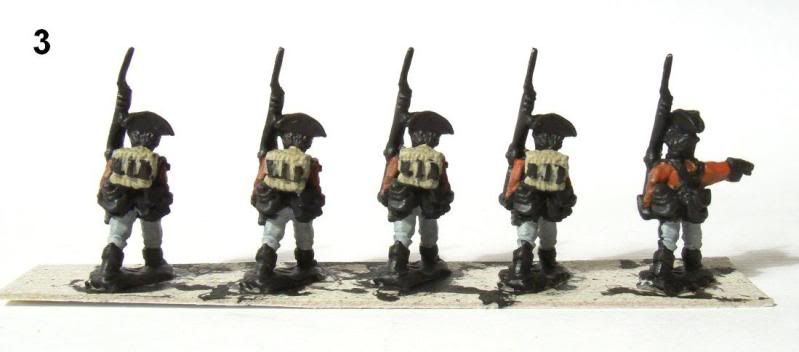
Foundry Moss Light, I’ve left the straps of the pack black, but they could just as well be painted over with the
Moss colour (Figure 3). Next comes the facing colours in any nice blue, I’ve used
Foundry Deep Blue. You could get away with just doing the cuffs as not very much of the lapels show, but it is worth the trouble. I’ve also used the opportunity to mix in a little blue into the red I’ve just used on the coats, to shade the Sergeant’s sash (figure 4).
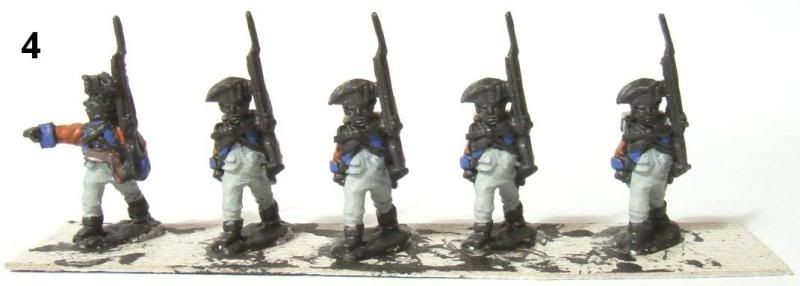
The few highlights to be used are done at this stage,
Foundry Bright Red Light for the coat and any white for the small clothes (figure 5). The highlight of the pack can be done now with white or later when painting on the white details. I don’t do it at this stage, as highlighting so much white can be tedious.
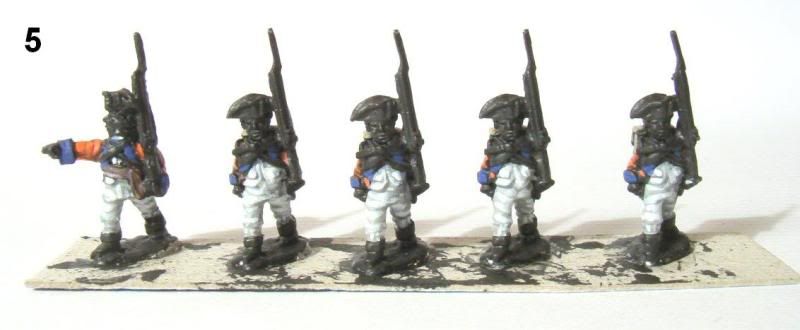
To get a break from the white I paint the bread bags Foundry Raw Linen, it’s a simple part which gives the brain a rest after highlighting the white; concentration will be needed for the next part.
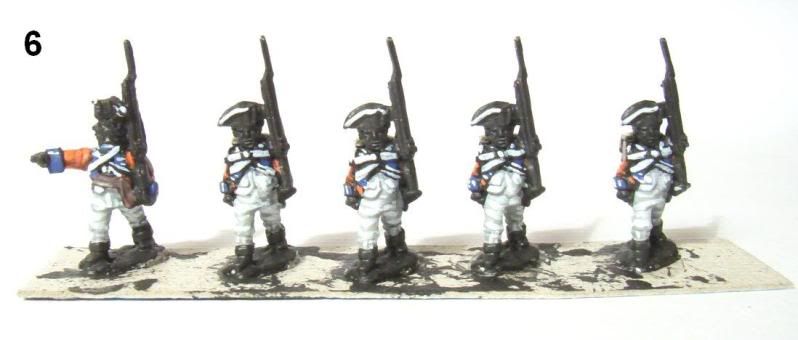
At this stage I recommend tackling the trickiest part; the white details. This includes the belts, the turnbacks, the hat tape, the musket sling and the lace. Just use any white, but use your finest brush and take your time. The lace is optional, but worth the effort, just use single strokes, nothing more complicated. The hat tape is sculpted on these figures so should that should help a bit; use the “blade” of the brush rather than the point. (Figure 6) The back pack can also be highlighted with white flecks, or indeed you could use a white drybrush, but I avoid this technique after having highlighted neighbouring colours, in case I drybrush them too.
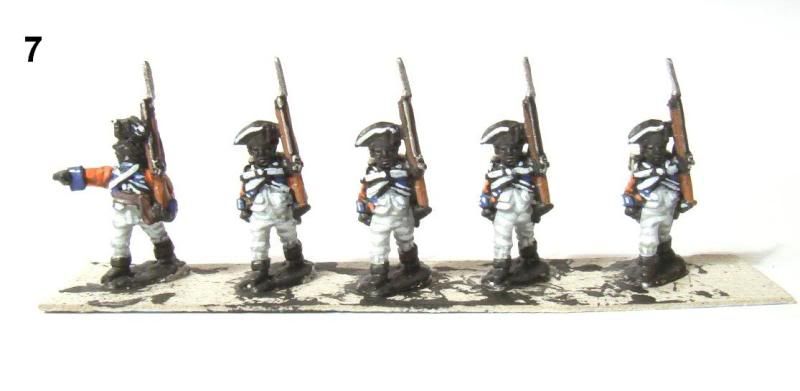
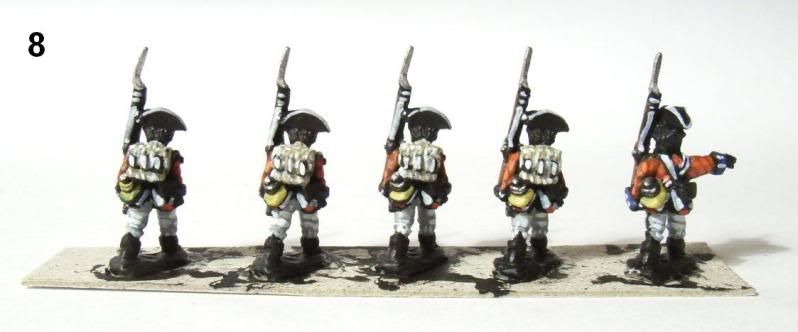
The musket is done at this stage with Foundry Armour; I like the metal parts to be quite shiny to represent well-polished muskets. Like the hat tape the musket barrel has been exaggerated on these figures, so the “blade” of the brush can be used effectively. The musket stock is done in Foundry Spearshaft Shade (figure 7). Also do the canteens at this stage (figure 8)
 Painting the flesh
I’ve separated this section as it’s a bit trickier than the others, and you may prefer to simplify it. Really it’s just a scaled-down version of the popular “Foundry” or “Dallimore” method (or any other of its legion of names if you prefer!)
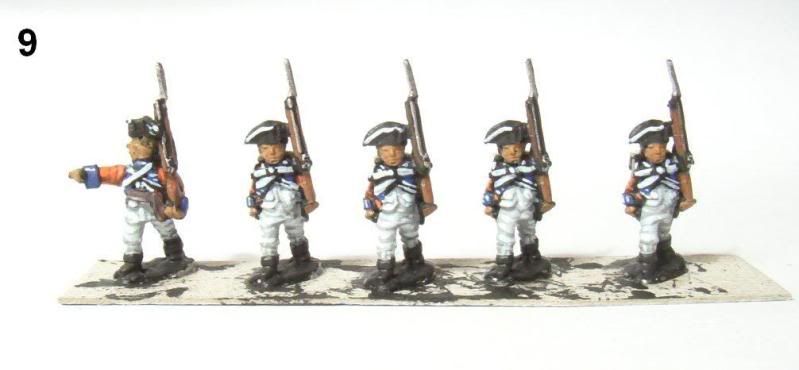
Start by blocking in all the flesh with Foundry Spearshaft. Granted, you could use the Foundry Flesh Shade, but it’s a bit too subtle at this scale, indeed I use the Spearshaft colour regardless of scale (figure 9).
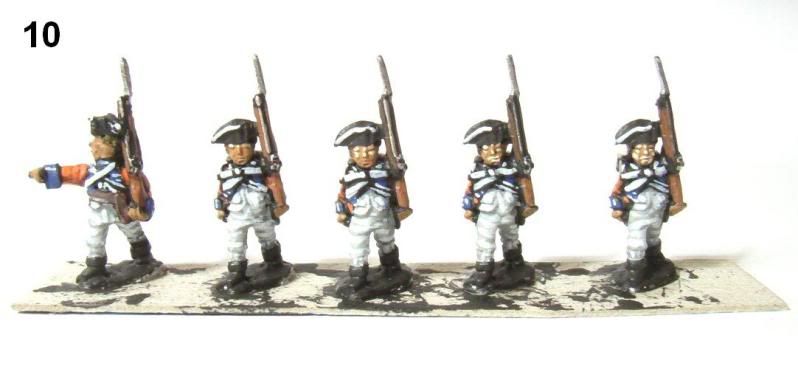
Use Foundry Flesh Light to paint in the details of the face, notice the mid shades are not used as three colours are not needed on small figures and the contrasts should not be subtle. I’ve shown the stages of this on the hatmen in figure 10, progressing left to right. The brow is done with a dot between the eyebrows and two lines to represent the brows. If you angle these downward slightly, it can give the soldier a frowning, serious look, which I think marching men should have. The nose and cheekbones are done the same way, though the nose should be more of a downward stroke. The mouth can be a flattened circle, much like clown makeup. Finally the jowls can be filled in, but try to keep the cheekbones and the mouth separate. Hands can be done with a solid area to represent the backs and palms, and two rows of four dots or strokes to represent the figures. Alternately, just use four long strokes for the fingers.
This does take time, but it’s not complicated, and I feel it really brings the figures to life. You can of course tweak it to your own liking; for instance a single line for the brow works as well. If any of the lines or dots aren’t perfect don’t worry too much, I usually just move on. Once the flesh is done the figures are practically finished (figure 11)

Finishing off
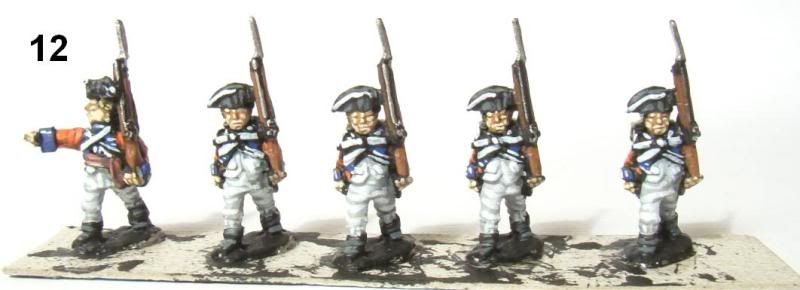
At this stage I check the figures and do the bits I consider optional, like highlight the Sergeant’s sash with Foundry Wine Stain Red, I also highlight the black with Foundry Charcoal Black but this bit will not be for everyone (Figure 12).
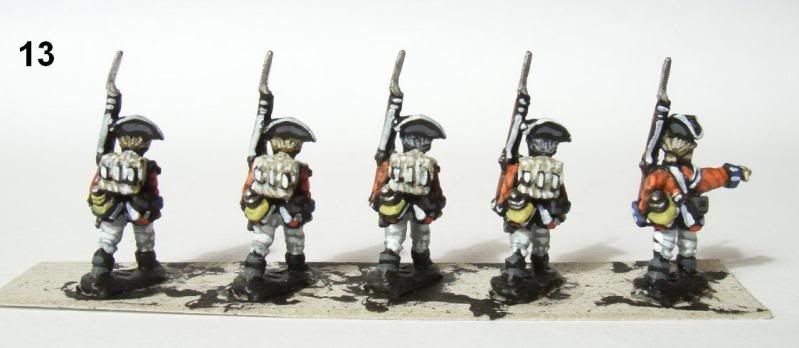
You can leave it out but I like to paint in some different colours of hair to give some personality to the figures. You can do this while doing other colours e.g. blondes when doing the bread bag, browns when doing the musket, and you can make the hair colours the same within the painting strip as you’ll be mixing the poses later. It’s worth highlighting hair to show its texture (figure 13).
A quick word on the officers; paint them the same way, but hat lace should be silver. Flagpoles should be red. The drummer’s lace can be painted on over the red of the coat or before the coat colour, then painting in the colour around the lace. I prefer the later, as it looks cleaner, but for the arm chevrons, don’t try to paint any colour between the chevrons, as they will be too close together, the black undercoat will form a nice outline to the white of the lace.
Varnishing
After going to all that trouble to paint the figures varnishing is absolutely essential. I use a coat of Games Workshop Gloss Varnish for protection. You can slop it on fairly heavily for speed’s sake, then use a dry brush to “suck” out any areas that are beginning to get pools of varnish. I find this faster than working carefully, and it gives as good a result, so long as you don’t allow the pools a chance to begin to solidify. Its best left overnight, but you can go on to the next stage after a couple of hours if you wish.
To kill the horrible gloss, I use Galeria Matt Varnish from Winsor and Newton. Its best to pour away the top quarter of the bottle when you get it, which should be a clear liquid, then use the remainder as your varnish and shake it very thoroughly, you may need to shake it up a couple of times as you use it as it can separate out again. I apply it in the same way as the gloss layer.
Basing
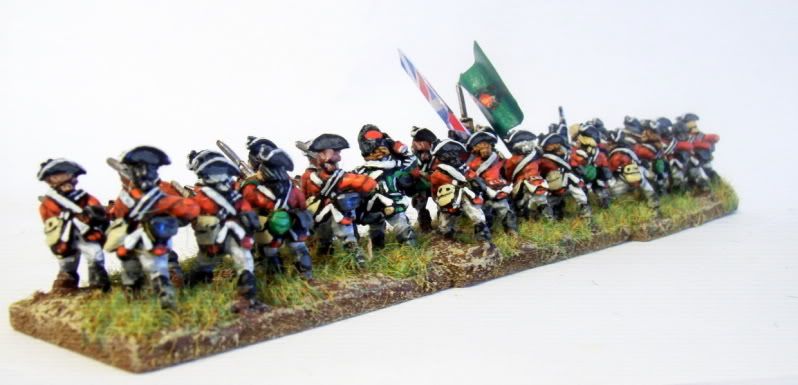
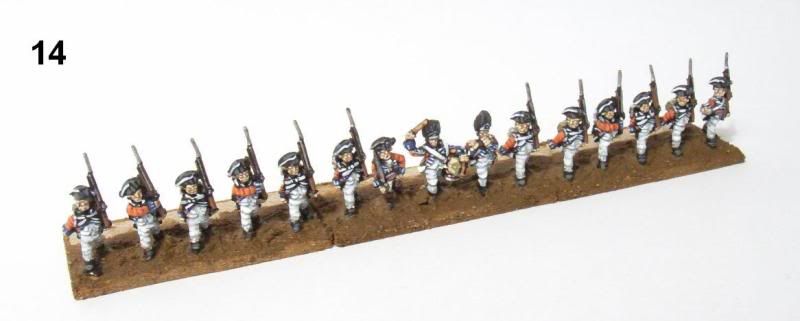
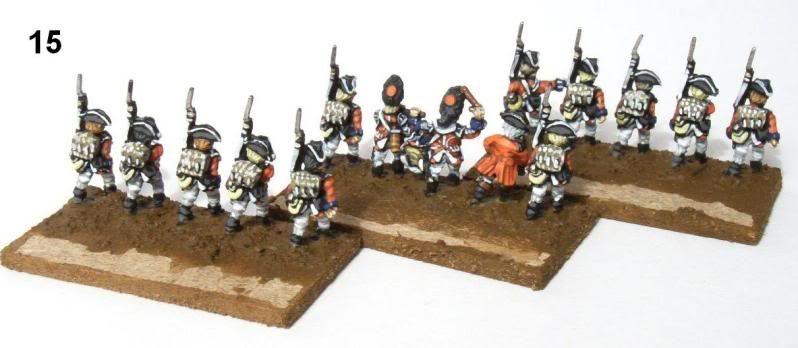
Good basing can lift mediocre painting, and bad basing can ruin well painted figures, so its worth taking time over; I have to admit its by far my least favourite part of the whole process. I use Warmaster style basing on 40mm x 20mm bases, though the size doesn’t matter. Base the front rank first, and think carefully at this stage about mixing the poses so that similar poses don’t all end up on the same base. Basetex Brown Earth is my preferred terrain material, which I think saves time over the glue-sand-paint approach. Paint in the earth around the feet of the first rank and in behind them Paint in the edges of the base in the same colour (figures 14 and 15). I leave out the second rank at this stage as if the were glued on they would make getting at the middle of the base difficult.
Once dry you can add the second rank, though I recommend painting your basing material around their feet, before you stick them down, as it will be tricky to reach without getting it on the figures, once they are glued in position. (Figure 16) Basing figures this size can be fiddly so think carefully; you don’t want to be trying to get your brush covered in basing material past lovingly painted figures in such a tight space; it can feel like playing "Operation!"
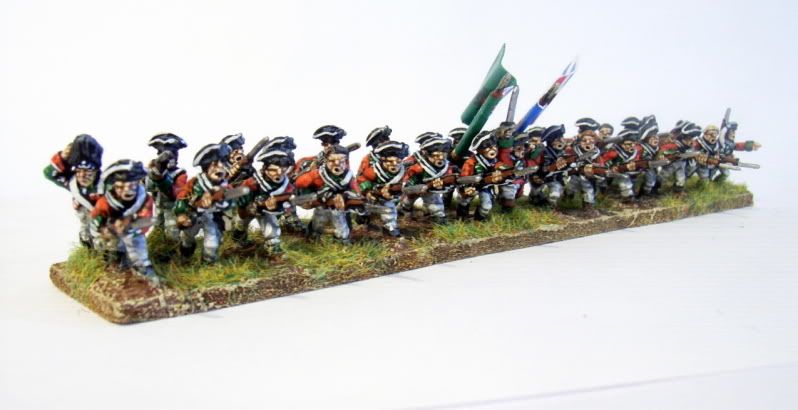
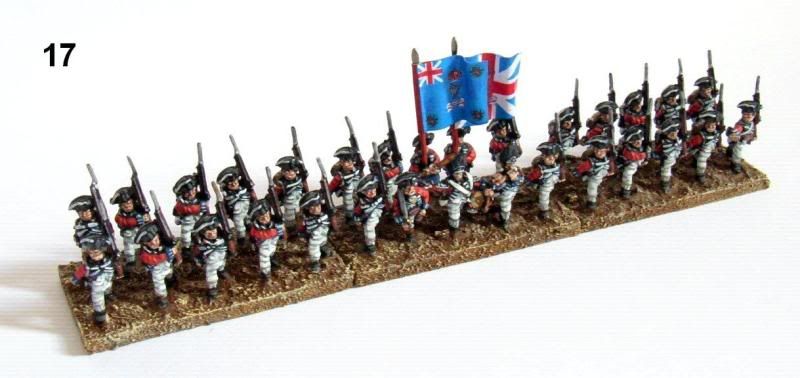
A drybrush highlight of Foundry Base Sand will bring out the contours of the earth; I’ve also popped on flags from Vaubanner Graphics at this point (figure 17). Be careful to leave a “tube” at the pole side of the flag when gluing the two sides together, so they can slide on and off the pole. This is particularly handy for switching flags to depict other royal regiments during the Revolution, as this regiment served only up to Bunker Hill before it got drafted. Very few regiments served in all campaigns so the ability to morph them is very useful.

Patches of PVA covered in static grass bring the unit to a finish, but be careful to use a fairly bright colour of grass as the darker ones get a bit lost at this scale. I find that if you water the PVA down a bit it helps the grass to stand up and it avoids the nasty gloss that can sometime appear under the grass.
Now you can sit back and admire your work.